Add Wallet
Guide to add wallet addresses to your Store on PayerScan to receive cryptocurrency payments.
Requirements
- A PayerScan account (registered at app.payerscan.com)
- A Store already created (see Create Store)
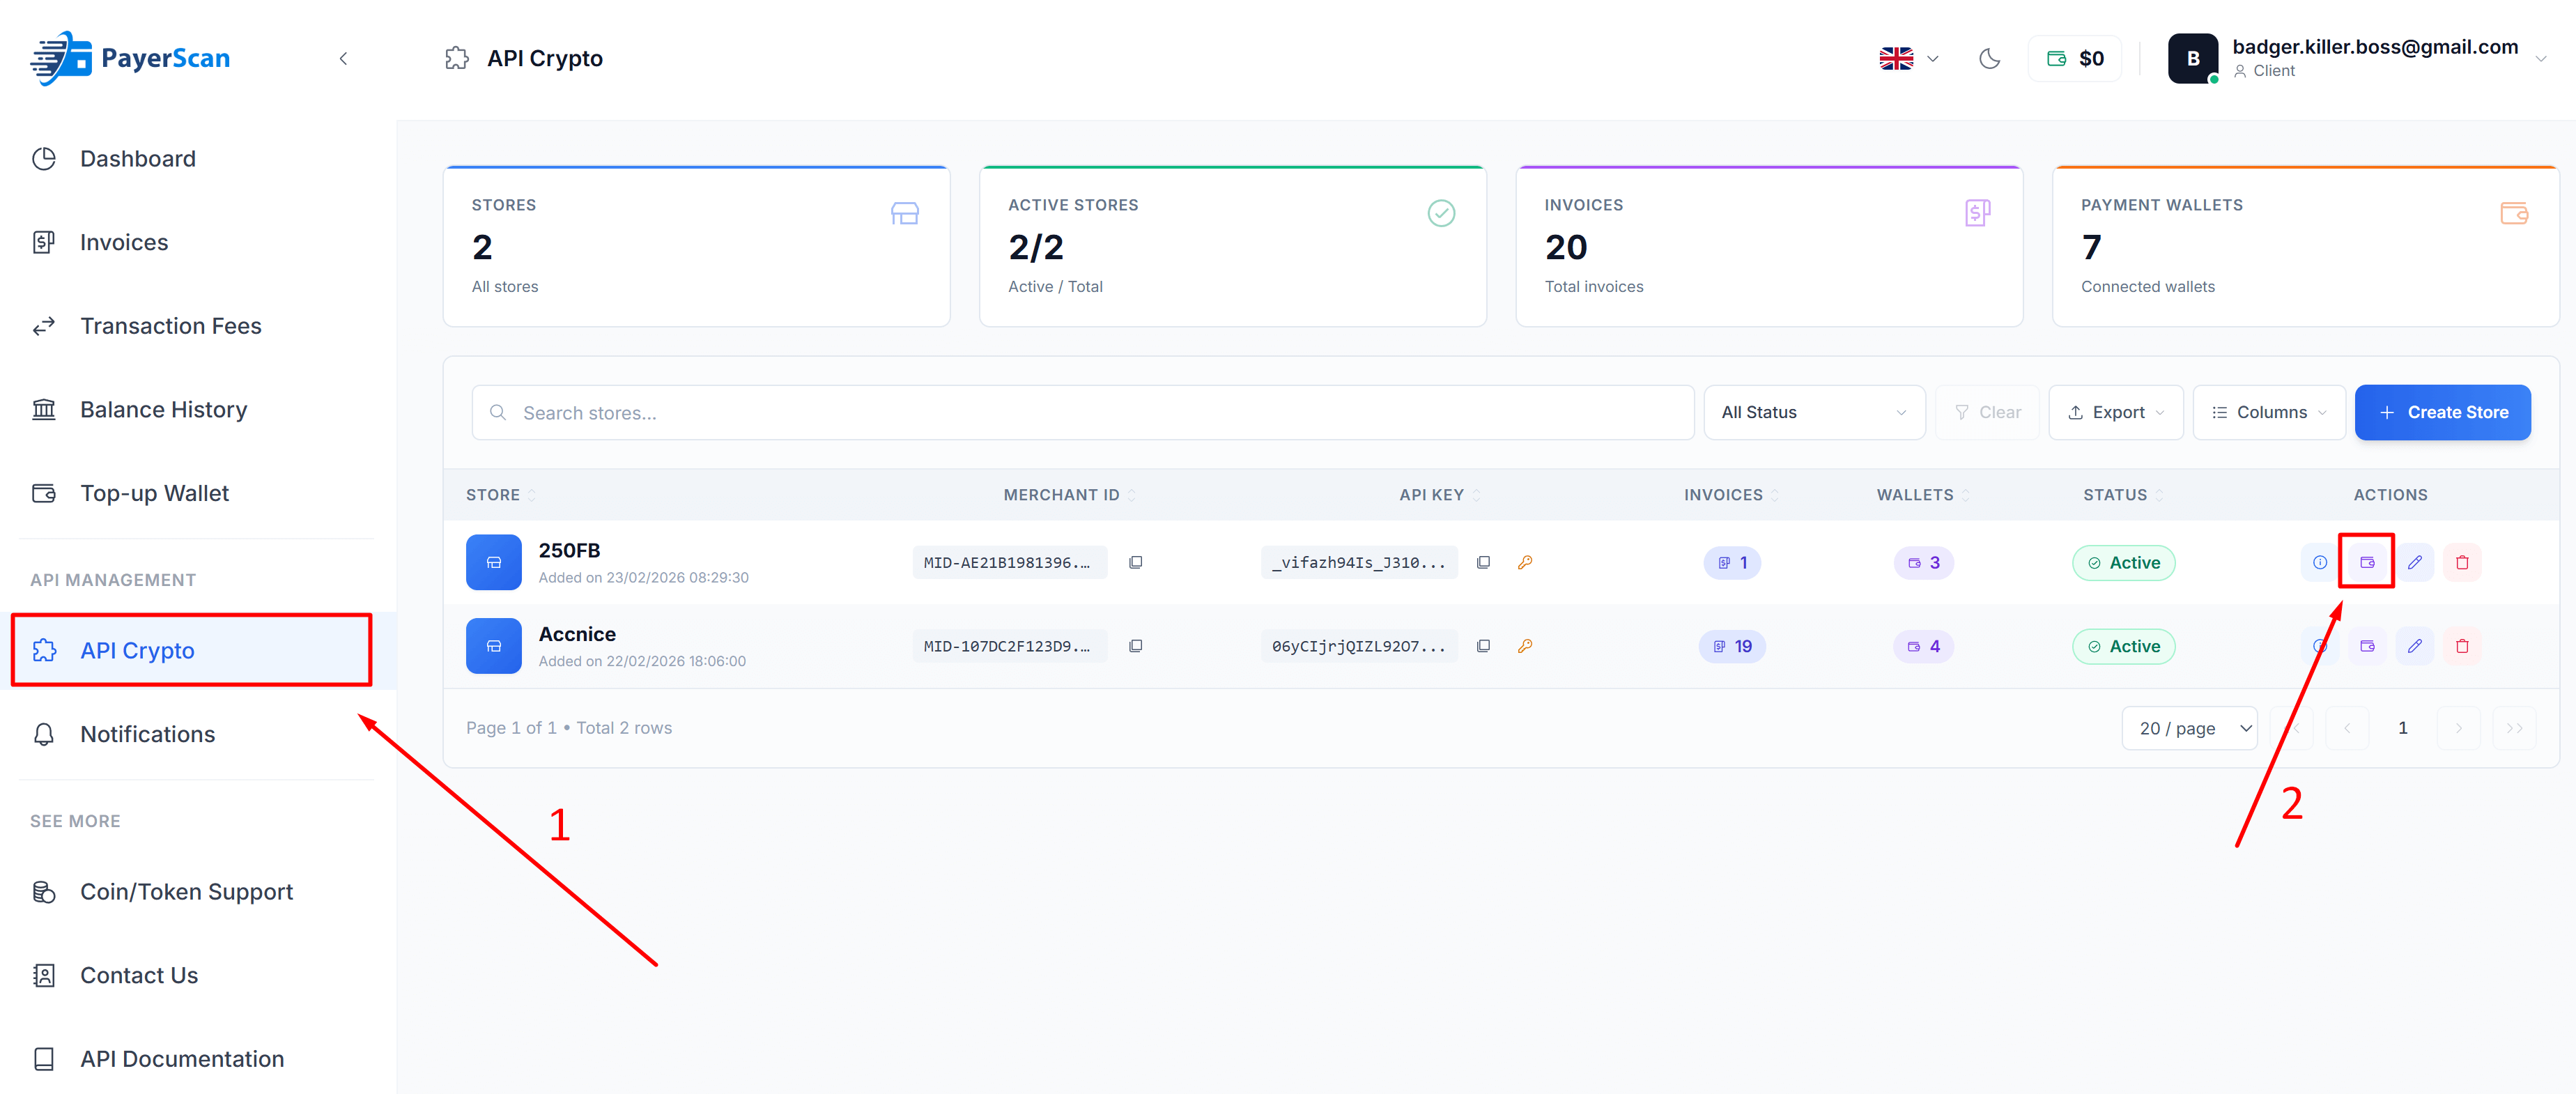
Step 1: Access Store Wallets
- Log in to the PayerScan Management Panel
- In the sidebar, click API Crypto to open the Store list
- Click the Wallet icon (in the Actions column) of the Store you want to add wallets to
Step 2: Click Add Wallet
In the Store Wallets page, you will see the list of existing wallets (if any). Click the + Add Wallet button (top right corner).

Step 3: Fill in Wallet Information
The Add New Wallet dialog will appear:
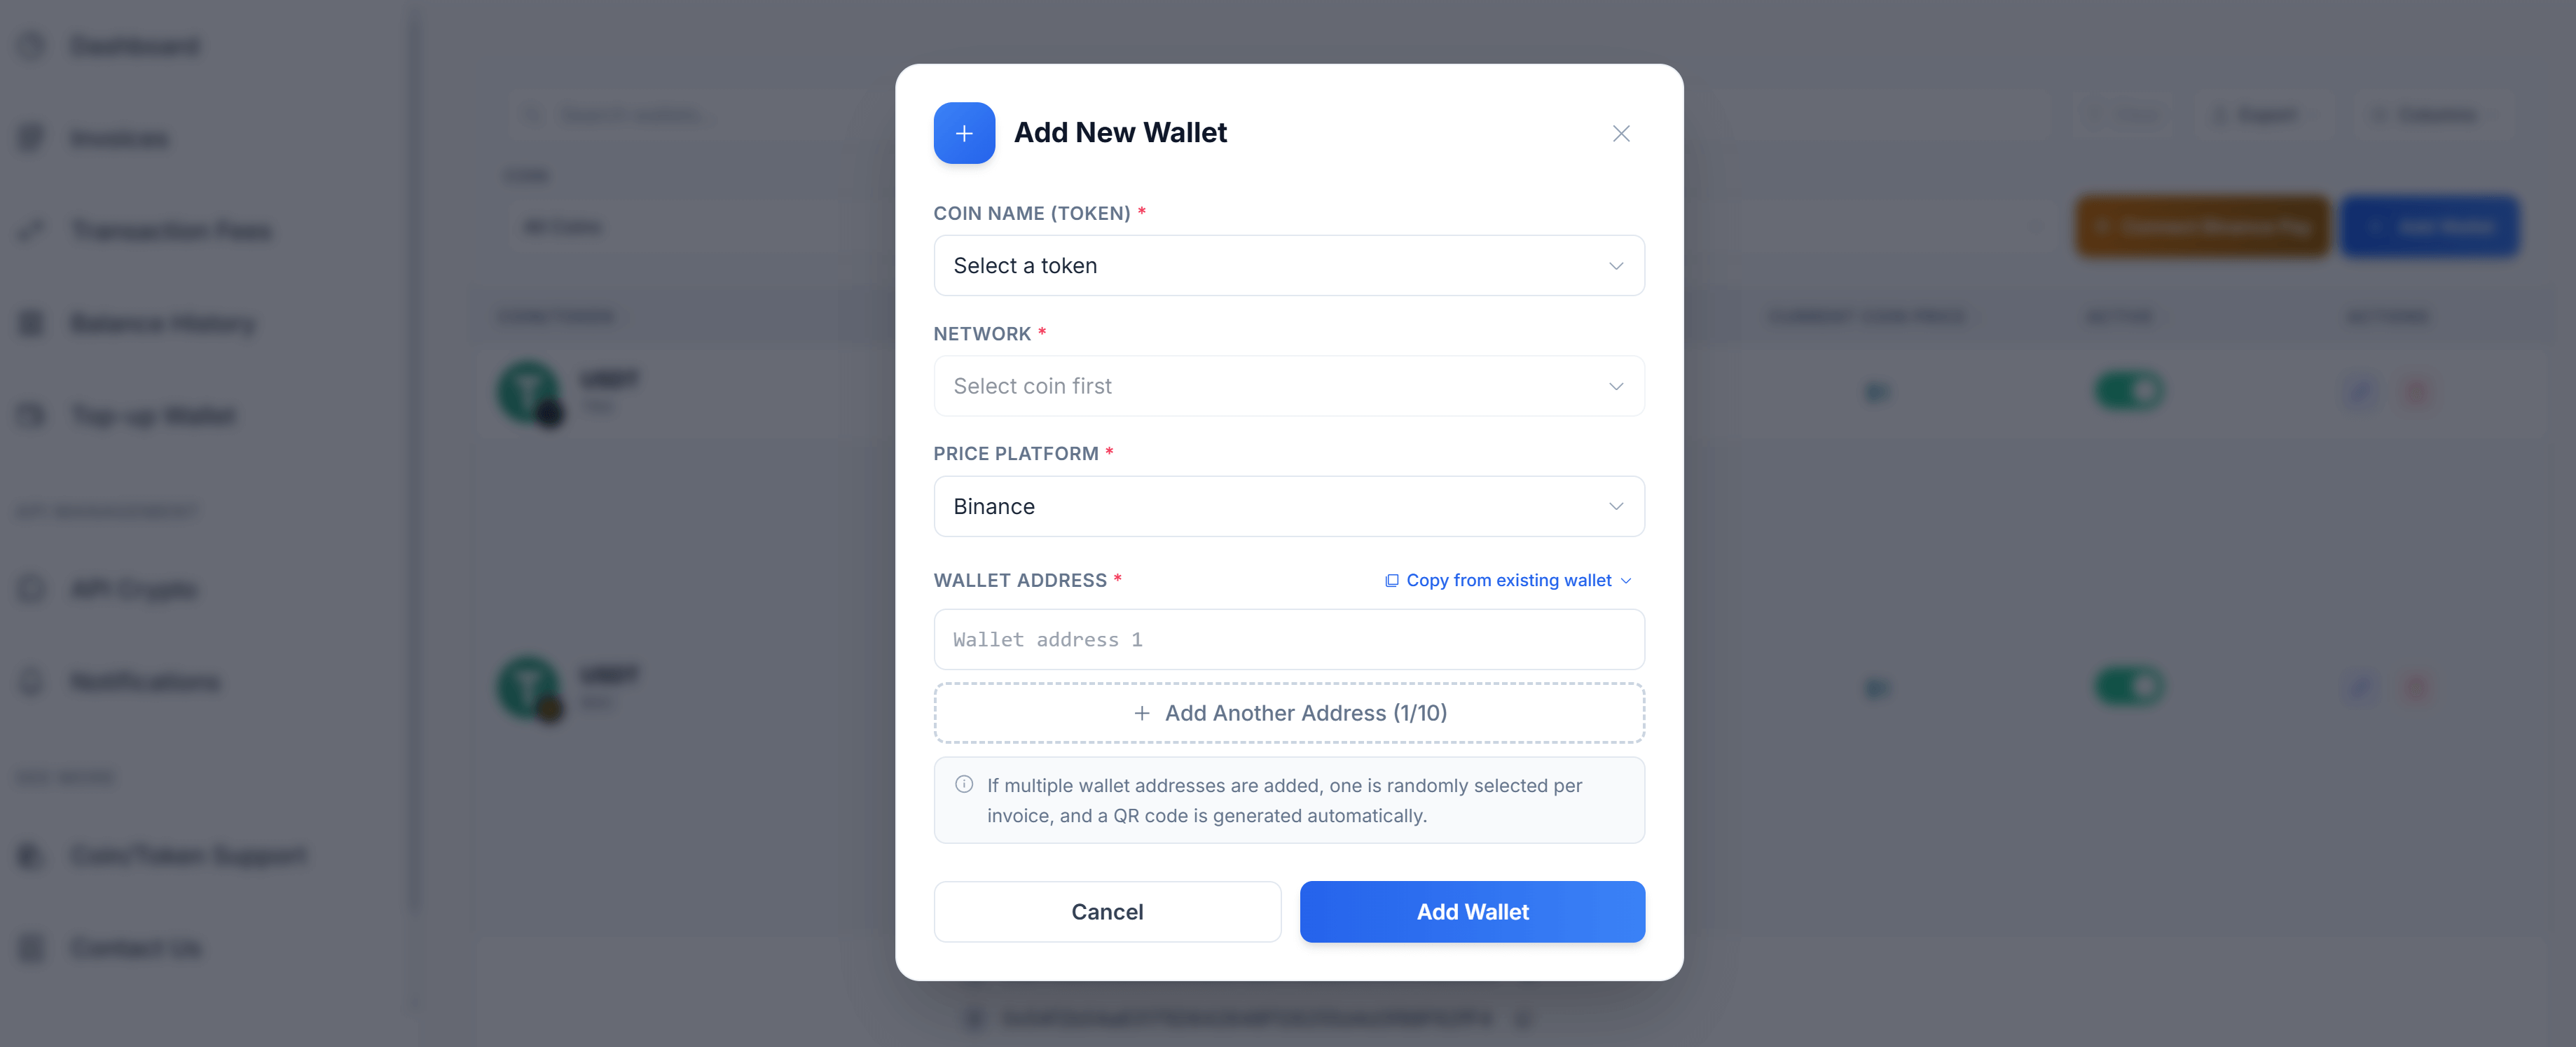
Fill in the required information:
| Field | Description |
|---|---|
| Coin Name (Token) * | Select the cryptocurrency token (e.g., USDT, BTC, ETH) |
| Network * | Select the blockchain network (e.g., TRX, BSC, ETH). Available after selecting a token |
| Price Platform * | The price feed source (default: Binance) |
| Wallet Address * | Your wallet address for receiving payments. You can also use Copy from existing wallet to reuse an address |
tip
You can add up to 10 wallet addresses for the same coin and network by clicking + Add Another Address. When multiple addresses are added, one is randomly selected per invoice, and a QR code is generated automatically.
Click Add Wallet to save.
Next Steps
After adding wallets, you can:
- Set up Binance Pay to accept payments via Binance
- Configure Webhooks to receive real-time payment notifications